
Our step-by-step instructions will show you how-to make this highly efficient camp fire/cooking surface, using common household power tools. Called by multiple names: Fire Torch, Swedish Log, Finnish Log Stove, Canadian Candle . . . this surprisingly simple DIY project, creates an atmosphere that turns any outdoor gathering into a real event.


You will notice how long the candle continues to burn and produce heat with just one log and minimum effort.
While there are countless ways to make a campfire, the Swedish Log offers some distinct advantages:
- Efficient Use Of Wood
- Flat Surface For Cooking
- Quick Heat & Usable Flame
- Keeps The Fire Off Of The Ground
- Self-Feeding & Self-Ventilating
There are a couple of different methods of making a Swedish Fire Log depending on the tools you have available, and we have chosen to use some of the more common at hand.


1. Gather Your Items:
- Wood Log that is cut flat on each side ~ for stability, choose a log that is not too dry, so it doesn't burn too fast, and not too damp, so that it will burn slowly and effectively throughout the evening
- Portable Drill with two different sized spade drill bits, 1-½” and ½”. You will want to get long drill bits or an extension to drill deep enough into the log. Pro Tip: make sure that your drill is powerful enough to handle a 1-½” spade drill bit (18V cordless drill should be sufficient)
- Portable Sawzall with a metal blade for wood
- Protective Equipment, gloves, ear and eye cover, etc.
- Barbecue Lighter


2. Drill & Cut the Log:
- Drill the center of the log from the top using the 1-½” spade drill bit. Drill the hole through ¾ of the log
- Drill a main air hole in the side of the log so it connects with the bottom of the 1-½” center hole. To make sure there is enough air flow, drill a series of holes along the side using the ½” drill bit, space the holes about 2” apart. Make sure that the holes connect with the 1-½” hole in the middle/top of the log
- Using the Sawzall cut wedges in the top. These wedges allow smoke to escape from the center hole when you put a pan on top of the log
- Make sure to save the wood chips to use as kindling when lighting the torch
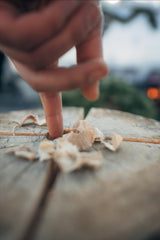

3. Baby, Light My Fire:
- Insert the wood chips/kindling into the center of the log, being careful not to overstuff (as this will restrict airflow)
- Using the barbecue lighter, carefully light the center of the log. The wood chips will start to smoke and burn, quickly the log will catch fire and burn steadily
Your torch should begin to burn nicely, if you carefully chose seasoned dead wood, which is best as it will burn easily. If the log is wet it will smoke, if it is too dry it will burn really fast.


4. Sit Back, Relax, and Enjoy:
- Building and lighting the torch is a very simple process, the fire stays neat and tidy, and extremely efficient
- Perfect for a romantic evening for two, or invite over a group of friends
- Ideal for being on the road, camping, or just hanging out in the back yard

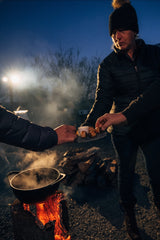

Cook a one pot meal, heat cocoa, or toast marshmallow and make s'mores.
If you are looking for security for your camping, or cycling travels, best have a lock to secure your camper, or ride while long distanced hiking or exploring, or other active outdoor business is at hand. Don’t let theft put a damper on your outdoor fun! Altor Locks helps keep your stuff SAF.
Do more, worry less—with Altor.
Share:
It's Giving Tuesday! How Can We Help? Support Phoenix Bikes in Mentoring Youth, Recycling Bikes, and Growing Community.
Can a Thief Tow Your Trailer with Safety Chains?